So I have been sewing my entire newborn stash of cloth diapers, which has been so much fun! I love making them! I wish I had a sewing machine here in the hospital so I could keep working on them though, because I didn't get as many made as I had hoped to. However, my grandmother will also be making me several, so that will be a huge blessing! Especially since a newborn will go through more diapers a day than an older baby/toddler.
All of these diapers are fitted diapers, so they are not water proof, but water resistent. During the day I can leave them without a cover if I want to, however I will be making some wool covers to put over them and possibly a few waterproof covers after she is born.
By making my own newborn diapers I saved about $250 on newborn cloth diapers alone!! This does not include the money we will save by not using disposables. On my OS diapers I will save at least $150-$450 on those cloth diapers. Making them definitely takes more time and effort, but the savings is fantastic! Plus this way I have creative choices.
You can watch here how I made these diapers! This is a multiple part series, but here it part 1:
Here are some of the diapers that I have made! (Lots of pictures! Sorry!)
 Above: This was my first diaper.
Closure: Velcro
Inner fabric: Flannel
Outer fabric: Flannel
Hidden layer: fleece
Soaker: 2 layers of terry towel
 Above: This was my second diaper.
Closure: Velcro
Inner fabric: Micro-fleece
Outer fabric: Flannel
Hidden layer: fleece
Soaker: 2 layers of terry towel
 Inner fabric: Flannel
Outer fabric: Eco Fleece
Hidden Soaker: 1 layer of terry towel
Separate Soaker:
2 layers microfiber
1 layer terry towel
surrounded by flannel
The remaining diapers have no closures, I plan to use either snappis or boingos to hook them.
Left: Front
 Left: Back
 Left: Outside
 Left: Inside and soaker
 Left: The front rise is folded down to make the diaper even smaller. Will be good to fit a smaller baby and under the umbilical cord.
Breast Cancer All-In-Two Hybrid Fitted
Inner fabric: Micro-Fleece
Outer fabric: Flannel
Hidden fabric: Fleece
Hidden Soaker: 1 layer of terry towel
Separate Soaker:
2 layers microfiber
1 layer terry towel
 surrounded by flannel


 Inner fabric: Micro-Fleece
Outer fabric: Eco Fleece
Hidden fabric: fleece
Hidden Soaker: 1 layer of terry towel
Separate Soaker:
2 layers microfiber
1 layer terry towel
surrounded by flannel and micro fleece


Inner fabric: Micro-Fleece
Outer fabric: Flannel
Hidden fabric: fleece
Hidden Soaker: 1 layer of terry towel
Separate Soaker:
2 layers microfiber
1 layer terry towel
surrounded by flannel and micro fleece


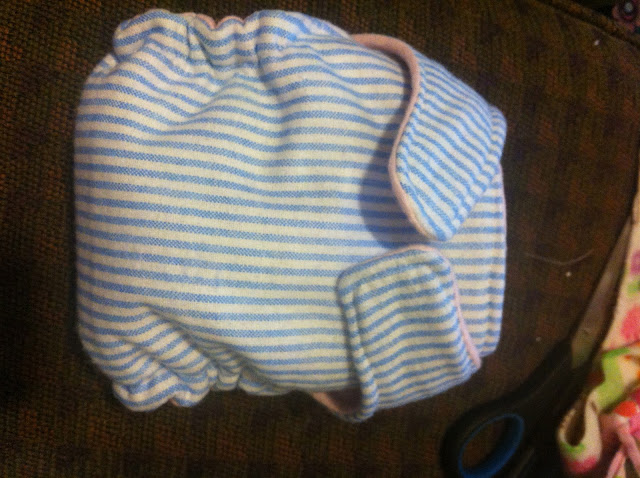 Sorry it's sideways... I don't know how to rotate it on here.
Inner fabric: Flannel
Outer fabric:Flannel
Hidden fabric: fleece
Hidden Soaker: 1 layer of terry towel
Separate Soaker:
2 layers microfiber
1 layer terry towel
surrounded by flannel


 Inner fabric: Flannel
Outer fabric: Flannel
Hidden fabric: fleece
Hidden Soaker: 1 layer of terry towel
Separate Soaker:
2 layers microfiber
1 layer terry towel
 surrounded by flannel

Although these are not all the ones I made, this shows the different fabric choices I have. I have several diapers that look very similar because of the fabric choices. When I get home I would like to make a few more newborn diapers if I have the time and energy. But then I need to get started on her bigger One-Size diapers. The one size diapers can change size with snaps making them bigger and smaller.
What do you think of my diapers? Have you ever made any cloth diapers? I'd love to see them!
Love,
Erica

All of these diapers are fitted diapers, so they are not water proof, but water resistent. During the day I can leave them without a cover if I want to, however I will be making some wool covers to put over them and possibly a few waterproof covers after she is born.
By making my own newborn diapers I saved about $250 on newborn cloth diapers alone!! This does not include the money we will save by not using disposables. On my OS diapers I will save at least $150-$450 on those cloth diapers. Making them definitely takes more time and effort, but the savings is fantastic! Plus this way I have creative choices.
You can watch here how I made these diapers! This is a multiple part series, but here it part 1:
Here are some of the diapers that I have made! (Lots of pictures! Sorry!)
All-In-One Hybrid Fitted

Closure: Velcro
Inner fabric: Flannel
Outer fabric: Flannel
Hidden layer: fleece
Soaker: 2 layers of terry towel
All-In-One Hybrid Fitted

Closure: Velcro
Inner fabric: Micro-fleece
Outer fabric: Flannel
Hidden layer: fleece
Soaker: 2 layers of terry towel
Birds All-In-Two Hybrid Fitted

Outer fabric: Eco Fleece
Hidden Soaker: 1 layer of terry towel
Separate Soaker:
2 layers microfiber
1 layer terry towel
surrounded by flannel
The remaining diapers have no closures, I plan to use either snappis or boingos to hook them.
Left: Front


Breast Cancer All-In-Two Hybrid Fitted

Outer fabric: Flannel
Hidden fabric: Fleece
Hidden Soaker: 1 layer of terry towel
Separate Soaker:
2 layers microfiber
1 layer terry towel
 surrounded by flannel


A part of the stash picture
Houses All-In-Two Hybrid Fitted
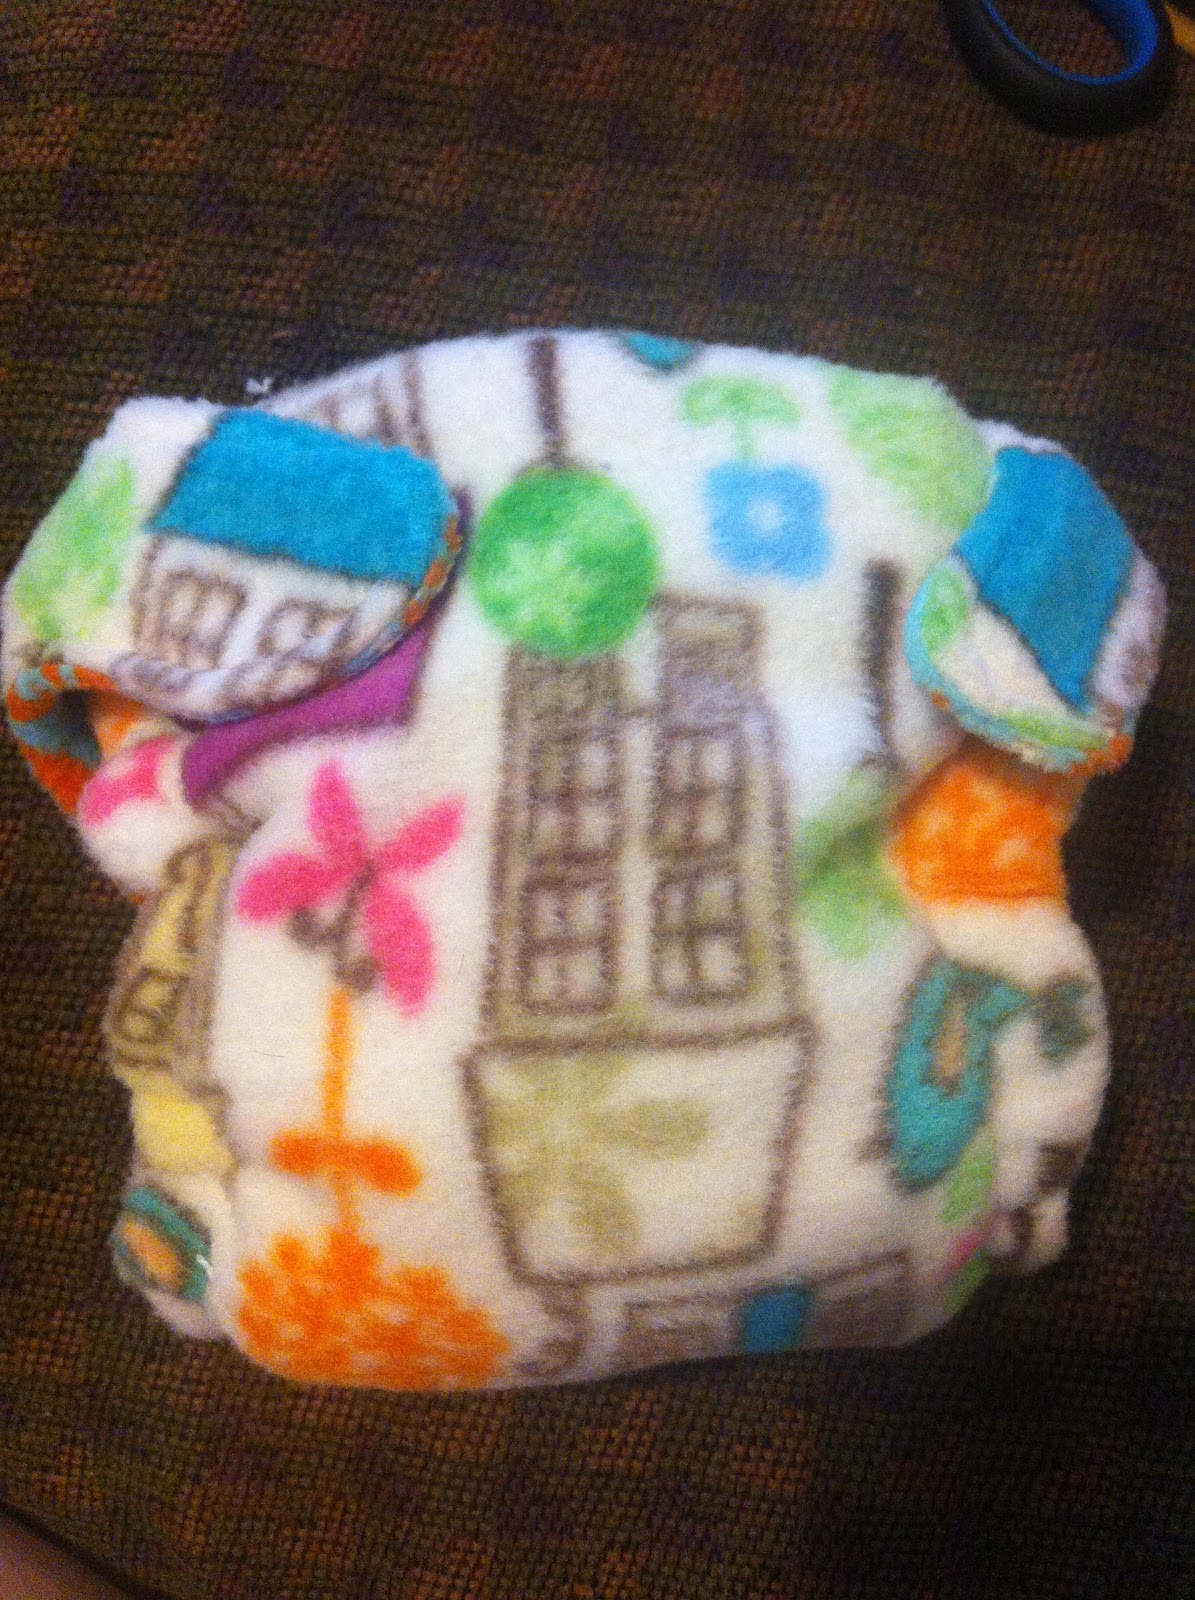
Outer fabric: Eco Fleece
Hidden fabric: fleece
Hidden Soaker: 1 layer of terry towel
Separate Soaker:
2 layers microfiber
1 layer terry towel
surrounded by flannel and micro fleece


Owl All-In-Two Hybrid Fitted

Outer fabric: Flannel
Hidden fabric: fleece
Hidden Soaker: 1 layer of terry towel
Separate Soaker:
2 layers microfiber
1 layer terry towel
surrounded by flannel and micro fleece


Stripes All-In-Two Hybrid Fitted

Inner fabric: Flannel
Outer fabric:Flannel
Hidden fabric: fleece
Hidden Soaker: 1 layer of terry towel
Separate Soaker:
2 layers microfiber
1 layer terry towel
surrounded by flannel


Green Plaid All-In-Two Hybrid Fitted

Outer fabric: Flannel
Hidden fabric: fleece
Hidden Soaker: 1 layer of terry towel
Separate Soaker:
2 layers microfiber
1 layer terry towel
 surrounded by flannel
Although these are not all the ones I made, this shows the different fabric choices I have. I have several diapers that look very similar because of the fabric choices. When I get home I would like to make a few more newborn diapers if I have the time and energy. But then I need to get started on her bigger One-Size diapers. The one size diapers can change size with snaps making them bigger and smaller.
What do you think of my diapers? Have you ever made any cloth diapers? I'd love to see them!
Love,
Erica